
How to get a Flat Roof Insurance Claim Approved
On the surface, flat roofs seem simpler than your average sloped roofs. But, with several different types of flat roofs and three different ways to install them, flat roofs are far from simple. Many adjusters don’t understand the intricacies of flat roofs and will often select the cheapest materials in Xactimate (i.e., Roll Roofing) – which often isn’t the correct material.
Because adjusters don’t have in-depth knowledge when it comes to flat roofs, the burden of proof falls heavily on you as the contractor. For example, if the adjuster doesn’t include enough modified bitumen, because he/she doesn’t understand how it is installed or ordered, you need to submit supporting documents – measurements, code requirements, core samples, invoices, etc. – that prove these funds and additional materials are needed.
So, what do you need to submit to get your flat roofing jobs approved?
1. Inspection Checklist & Measurements. At Elite, we require a filled-out inspection checklist for all flat roof jobs. Why? We need to know what types of products are currently on the roof and how they are applied. We also need to know what type of penetrations the roof has. For example, the number of drains, pipe jacks, exhaust vents, etc.
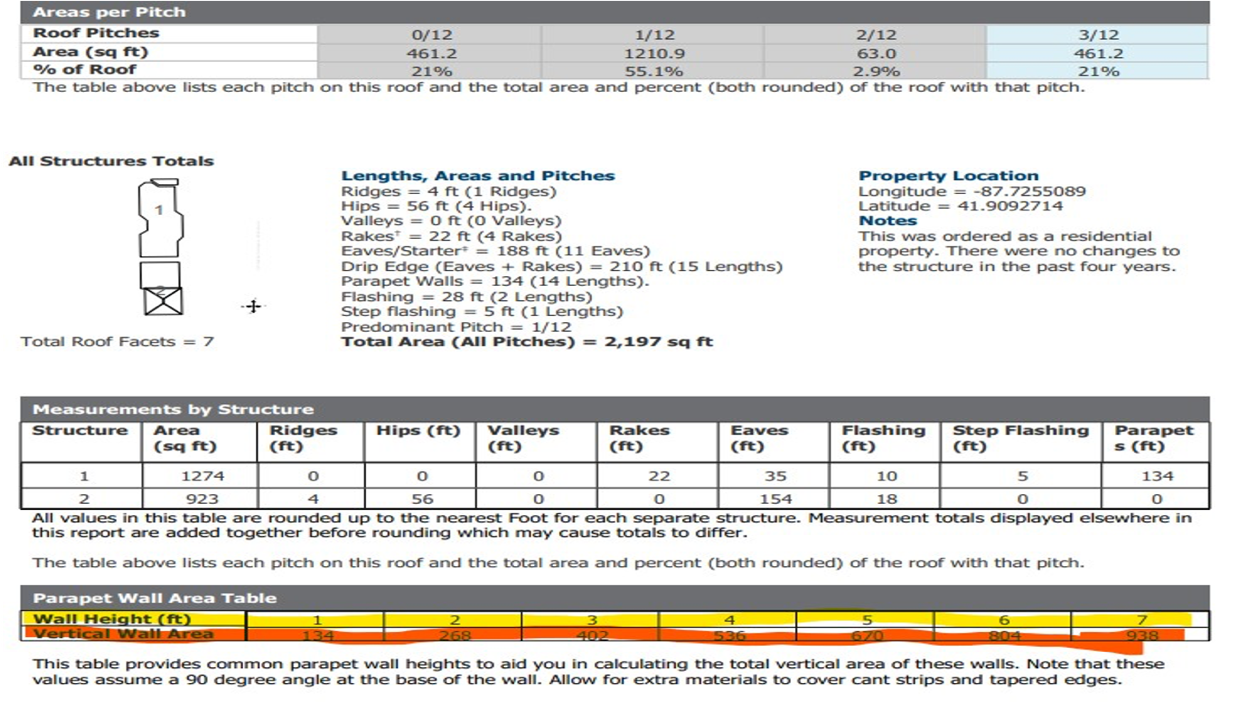
Measurements are super important when it comes to ordering the correct amount of materials, and for proving to adjusters why you need that amount. For flat roofs, the wall height is especially important to determine how much material to install. The wall could be anywhere between 1 and 6 feet high and most times this is left off an adjuster’s scope of loss.
Download Elite’s Roof Inspection Checklist.
2. Photos from the photo checklist. As always, you will need photos to prove your case. Damage photos, flashing photos, photos showing access issues, core sample photos, etc. will be necessary to show why you need what you’re asking for.
Download Elite’s Photo Checklists
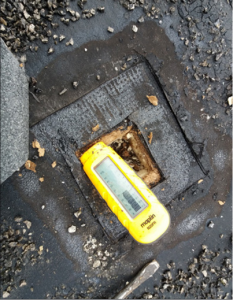
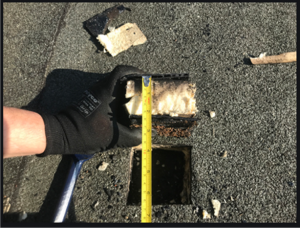
3. Roof Core Sample. We recommend taking a core sample to give us a better indication of what lies beneath the top layer. A roof core sample is a process in which you bore or drill out a two-inch diameter hole in the flat roof, from the top layer to the deck, to see how many layers of roofing material and insulation exist. Core samples are critical to establish how much labor and debris charges should be included on the Xactimate estimate and, when documented correctly, it is very difficult for the adjuster to deny those funds.
Core samples are typically taken with a tool known as a core cutter, roof core sample tool, or a roof core sampler. Roof core sample tools can be manually operated or attached as a drill bit and range in price from $50 to $200.
Example of manually operated core sample tool.
Example of power drill core sample tool.
Remember to take pictures showing you completed a core sample and to prove the number of layers present!
4. Thermal Imaging. There are a couple different ways to detect a leak, but we recommend using thermal imaging. In fact, we’ve gotten total roofs approved based on thermal images. When moisture penetrates the membrane, it causes the area to hold heat. So, if there are red areas on the thermal image, it means water is underneath the cap sheet/flat roofing system. If the image is as red as the image below, code will require the roof to be replaced.

Photo Caption: The red across the roof shows areas where moisture has penetrated the membrane
There are plenty of services out there that you can use to have thermal images taken for you. You can also ask your local supplier if they have a thermal imaging camera for purchase.
For more information about flat roof supplementing, check out Elite’s Flat Roof Supplementing page.